
The following article appears in the August 2015 Alpaca Association of New Zealand official magazine.
Alpaca are beautiful and intelligent creatures and they take a gorgeous photograph. Combine that with some of New Zealand’s sublime scenery and you have a recipe for something stunning. Following are a few tips and suggestions that may help you with your photographs whether you are using a smartphone, point and shoot compact camera or a Digital SLR.
Before we start, I have two things I would like you to do first, don’t laugh at the first one. Number one is read the manual – yup, your camera manual gives you a lot of tips and suggestions for photographing sports, portraits and even animals. The second thing is to keep your equipment clean – give the little lens on your smartphone a wipe with your sunglasses cleaning cloth or pop into your local camera store and invest in a little box of lens cleaners. You will be AMAZED at the difference!
Then, still before turning your camera on, pay special attention to your backgrounds and wherever possible, try for as little clutter behind the animals as possible – fences, troughs, gates etc. Also check to see that any fences or trees that are in the photograph are not growing out of your animals head – or cutting them off across the neck. In this example, the photograph above is taken in harsh sunlight, the background is cluttered and I’ve cut the Mum off across the base of her head – not my finest moment!
If you have a tree line with the sun going down behind it, well thats basically the money shot as far as animal photography is concerned!
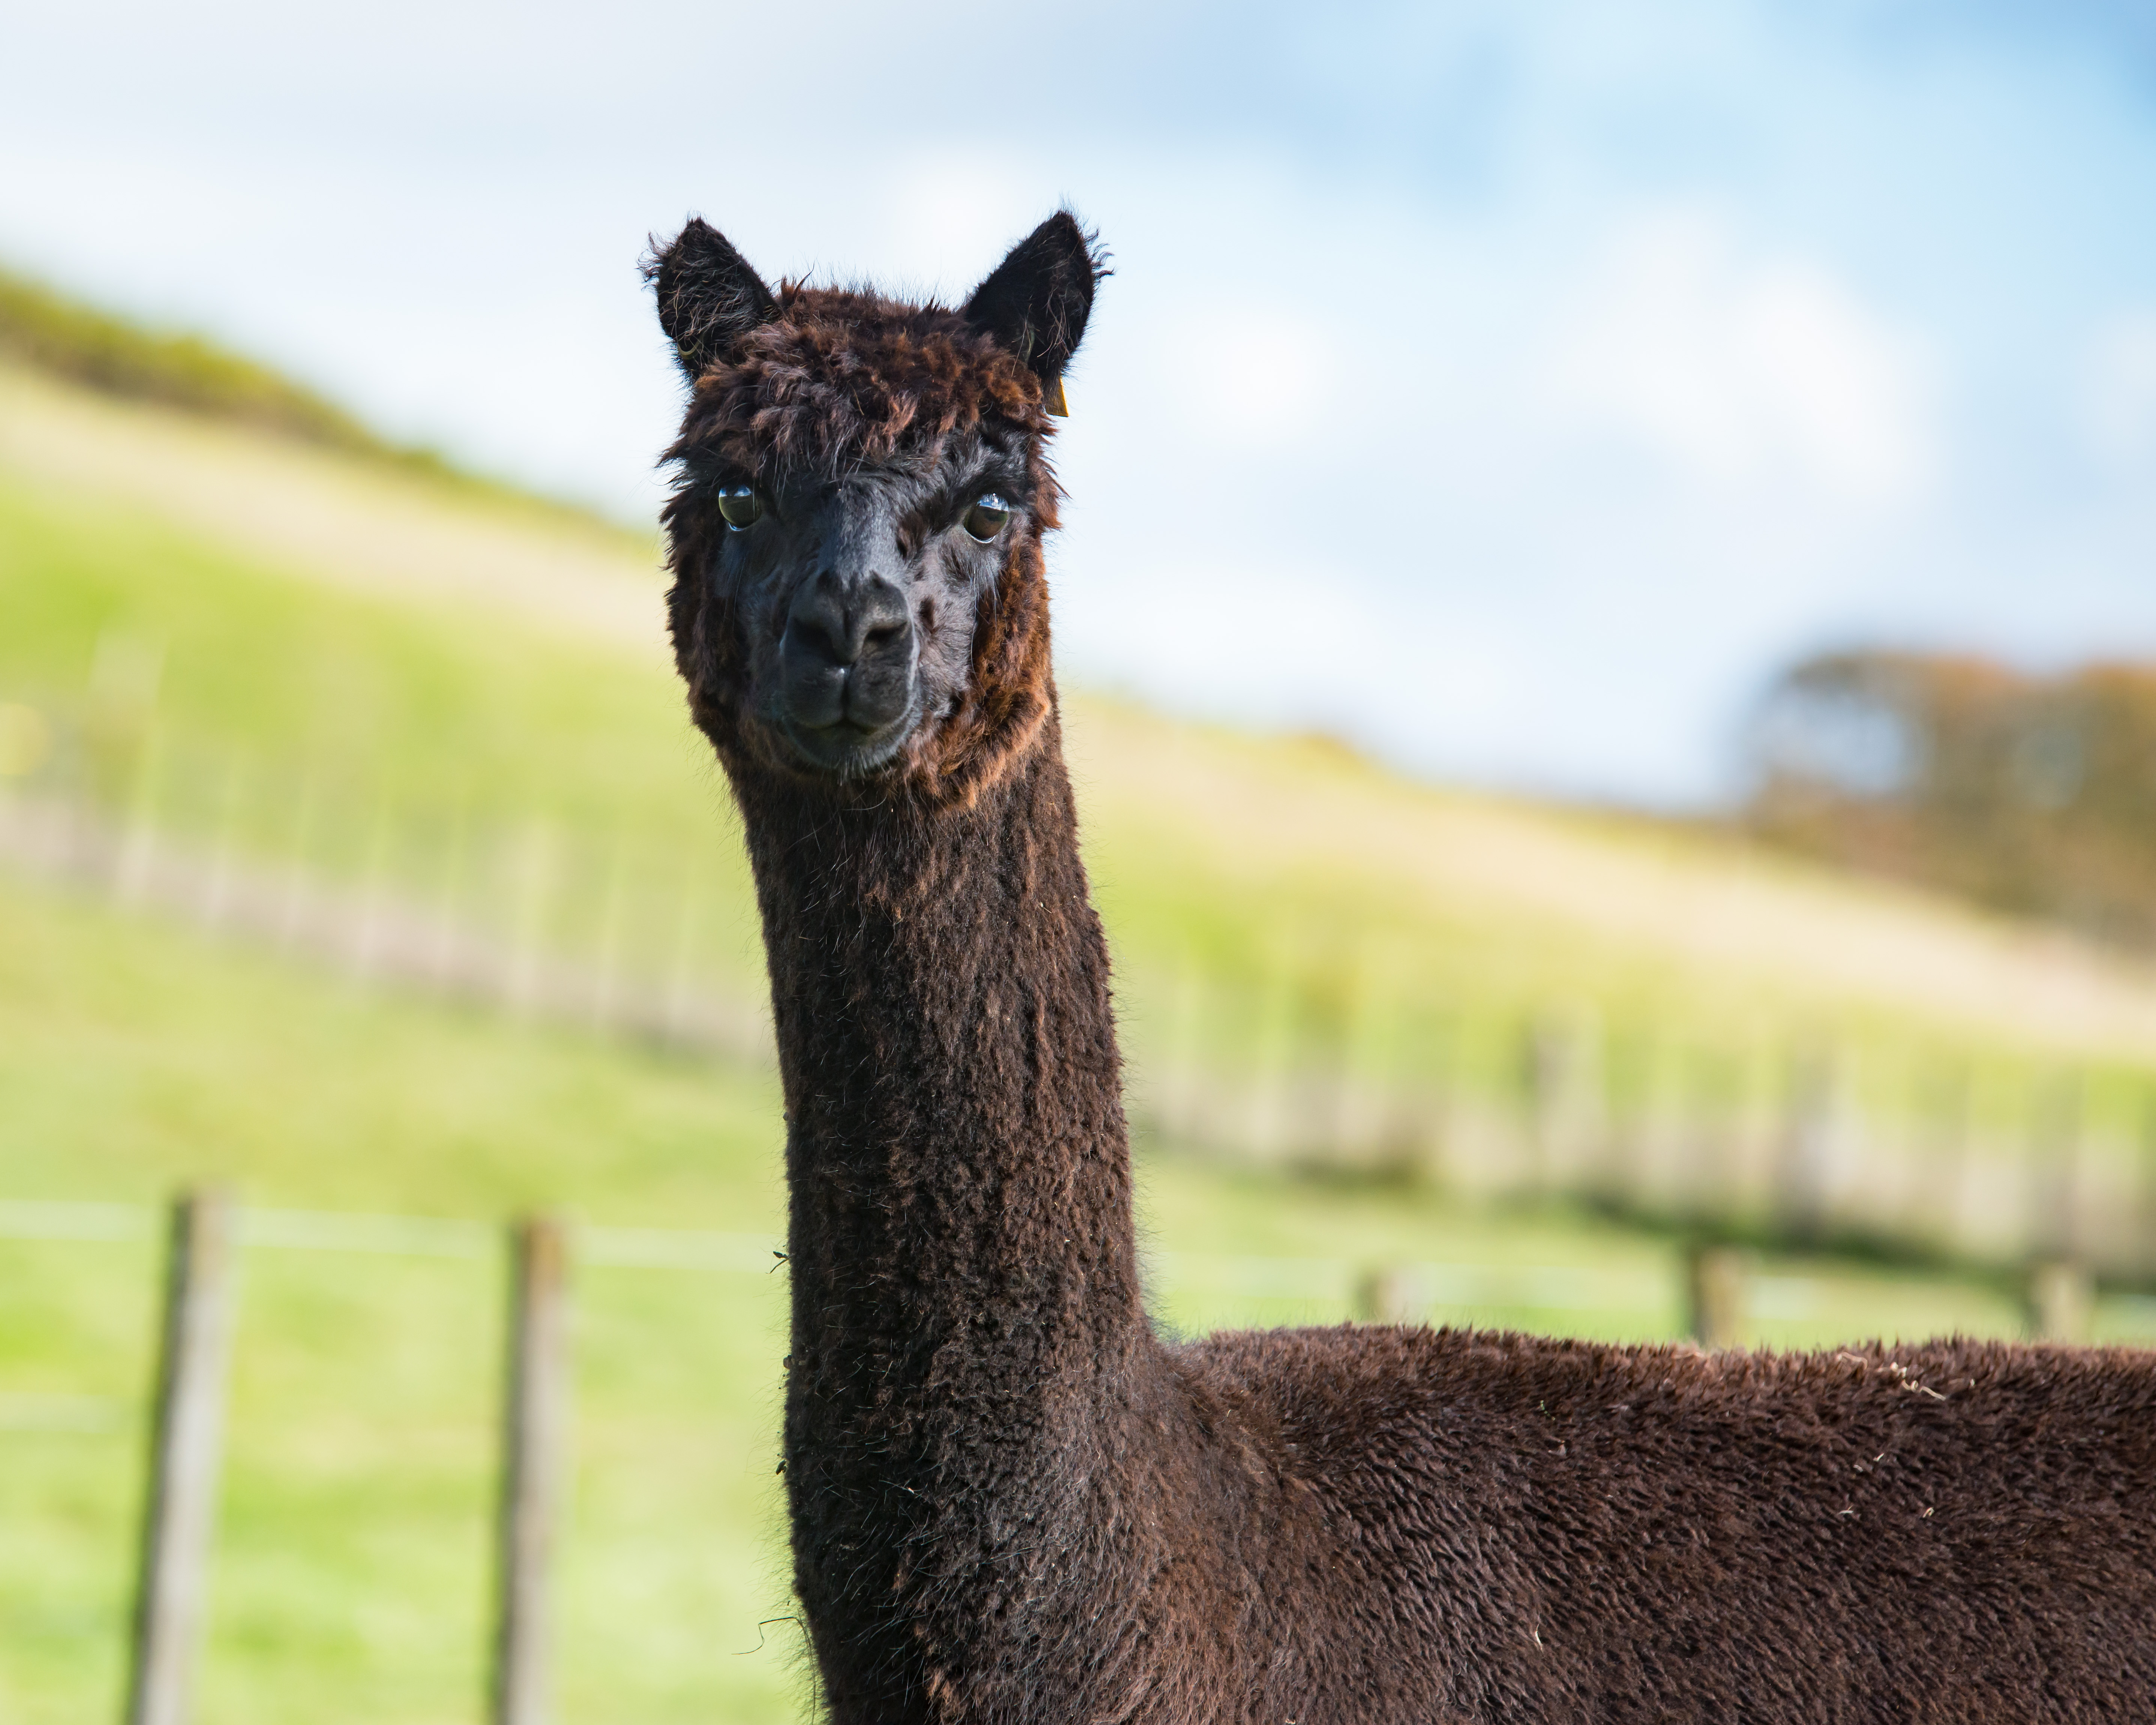
In animal photography, the same as people portraits, the best photographs come with a connection. Normally we get that through eye contact or when the photograph tells a story. You will notice a little white sparkle in the animals eye in this photograph below – this is called a catchlight and brings life to all of the animals I shoot. I try and find one or two for every image.
There is a basic rule of composition called the Rule Of Thirds – it says that the main elements of your photograph should be on one of the three vertical or horizontal lines. This rule is supposed to create a photograph that is pleasing to the eye and for the most part it actually works, however most rules are made to be broken so don’t be afraid to try a square crop with the animal right in the middle! Here is a demonstration image {Rule of Thirds – Screenshot + DSC_2439} where you can see I have cropped to 8×10, on one of the thirds and I have the animal looking out of the photograph.


The best time of day to photograph, and this applies to animals and people, is in “Golden Hour”.
This is an hour before and an hour after sunset when the light is a lovely golden colour and it is at its most even. During Golden Hour, using your DSLR, or if you have manual settings on your compact camera, set your aperture wide (around f/2 or f/2.8) to capture beautiful speckles of light behind your animals – we call this bokeh and it’s just magic!
Photographing in the middle of the day is the hardest as the light is harsh and the shadows are unforgiving. If the middle of the day is your only option, try and find the shade if possible. If you are photographing fleece in the middle of the day, a piece of net curtain held between the fleece and the sun will help soften the light. I would recommend never using a flash when photographing fleece – and try and hold it very loosely so that people can see the crimp.
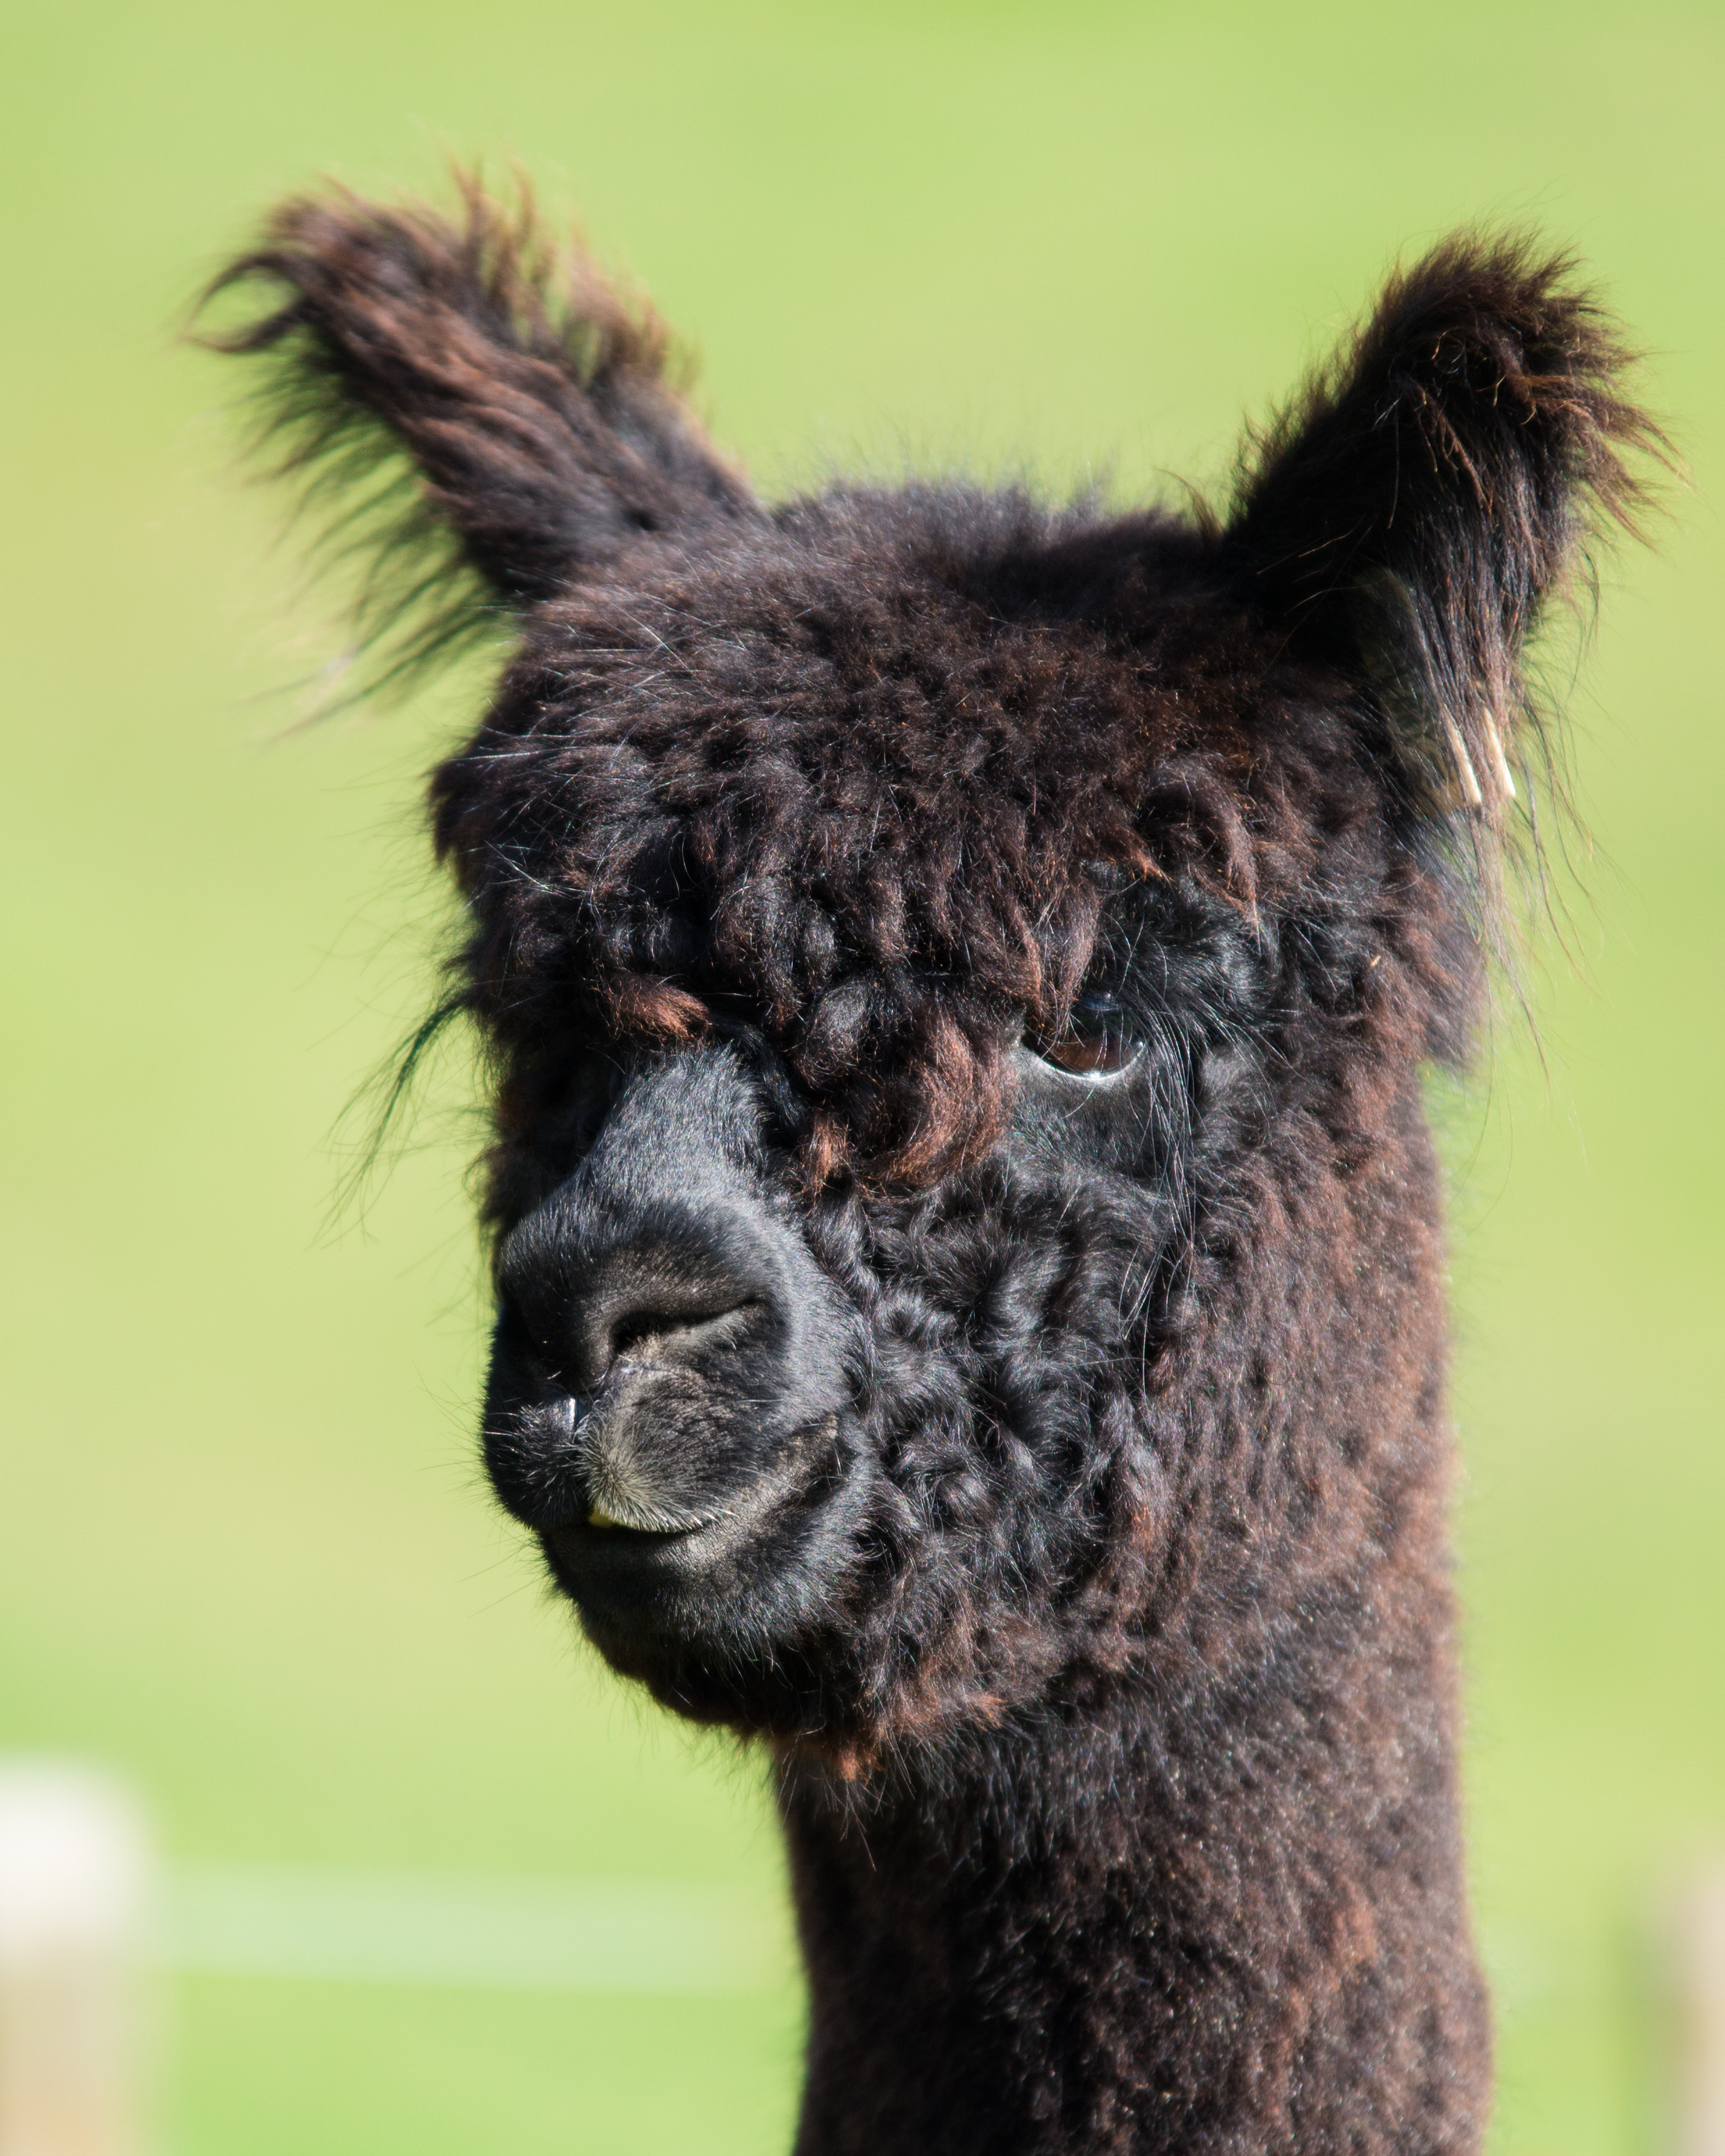
By far, the hardest of your animals to photograph are the black alpaca, and the Suri even more than the Huacaya. The easiest way to bring out the beautiful details of their face, and eyes, is to photograph them with the sun behind you.
Before And After
I’d just like to say a big thank you to Jackee and Jeff at Ataahua Alpacas for allowing me to explore their farm. We were photographing on a bright sunny day so here is a Before And After for how I processed this image. I shoot with a Nikon D800 (fullframe), a 70-200mm lens and I process using Adobe Lightroom. I deliberately made the photograph darker by underexposing it so I could adjust it later.

Firstly I crop to an 8×10 (I know this image needs some off the left and 8×10 is a good size for websites and looks good in Facebook timelines). I removed the feed from the blacks mouth, and increased the clarity to highlight the facial features. I increased the lighting in the shadowed parts and warmed it a little.


The more time you spend with your animals practicing your photography, the better your images will become. And if its just not working, get in touch with me, I’d be happy to come and help you out.


